Thursday, 20 September 2018

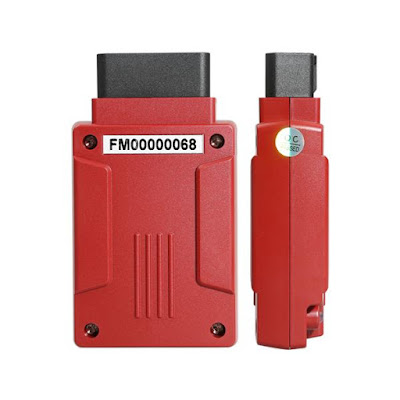
FVDI J2534 is successfully installed with Scanmaster-ELM & PCMscan

Scanmaster-ELM & PCMscan can be installed on the interface FVDI J2534, this post will show the procedure.
fvdi-j2534-diagnostic-tool-for-vcm-1


Guide


Part 1: Install PCMscan ScanMaster -ELM

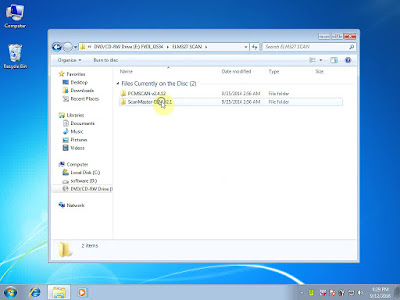
Open CD, then "ELM327 Scan", then "ScanMaster -ELM v2.1".

scanmaster-elm-pcmscan-install-on-fvdi j2534-01


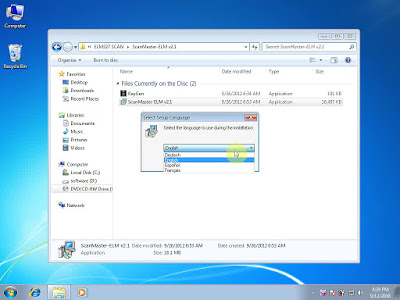
Select ScanMaster -ELM language: English, Spanish or French.
scanmaster-elm-pcmscan-install-on-fvdi j2534-02


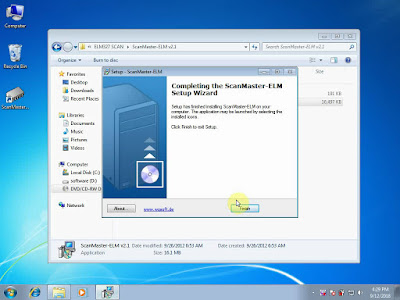
Follow the prompt to click next until completing the ScanMaster -ELM setup Wizard.
scanmaster-elm-pcmscan-install-on-fvdi j2534-03


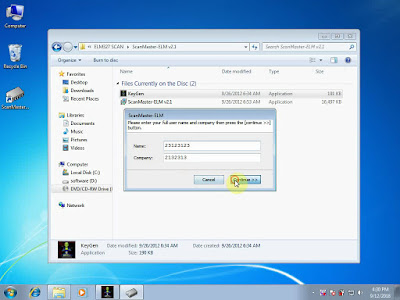
Click on the " ScanMaster-ELM" on the desktop, fill in the name and Company.
scanmaster-elm-pcmscan-install-on-fvdi j2534-04


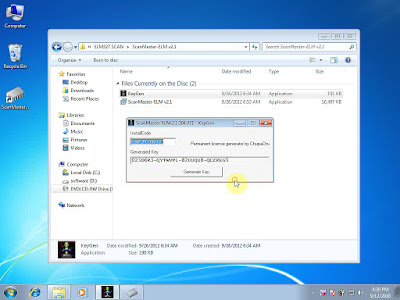
Copy the install code and paste it into the keygen to generate key.
scanmaster-elm-pcmscan-install-on-fvdi j2534-05

scanmaster-elm-pcmscan-install-on-fvdi j2534-06


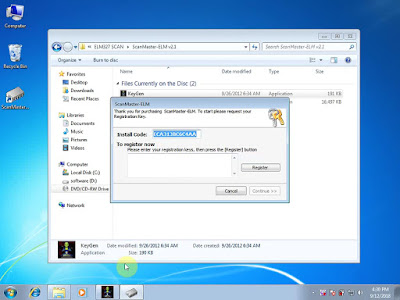
Copy the registration key and press [Register].
scanmaster-elm-pcmscan-install-on-fvdi j2534-07

scanmaster-elm-pcmscan-install-on-fvdi j2534-08


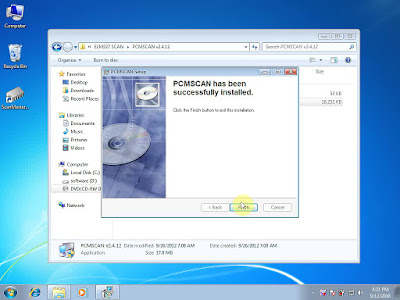
Part 2: Install PCMscan
scanmaster-elm-pcmscan-install-on-fvdi j2534-09

scanmaster-elm-pcmscan-install-on-fvdi j2534-10


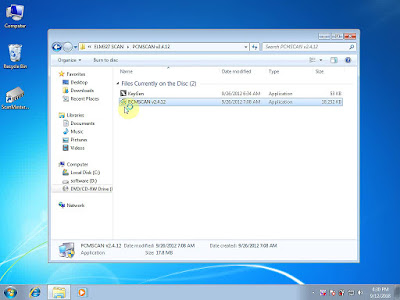
Send the PCMSCAN to the desktop.
scanmaster-elm-pcmscan-install-on-fvdi j2534-11


Open "PCMSCAN".
scanmaster-elm-pcmscan-install-on-fvdi j2534-12


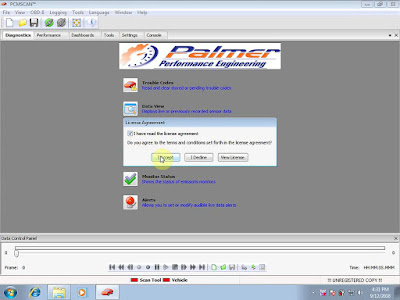
Enter the registration code.
scanmaster-elm-pcmscan-install-on-fvdi j2534-13


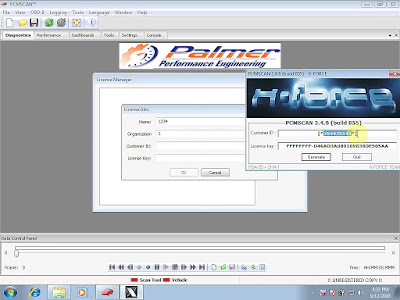
Use the keygen generate customer ID and License key.
scanmaster-elm-pcmscan-install-on-fvdi j2534-14


Part 3: Install FVDI J2534 Ford

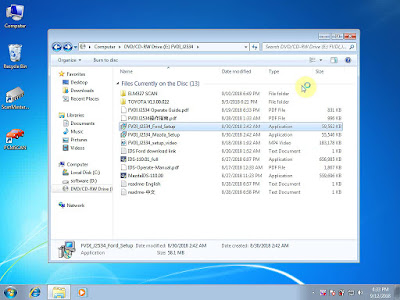
Back to open " FVDI_J2534_Ford_Setup", follow the instruction to install until InstallShield Wizard Complete.
scanmaster-elm-pcmscan-install-on-fvdi j2534-15

scanmaster-elm-pcmscan-install-on-fvdi j2534-16


Delete FVDI J2534 for Ford.

Right click "Computer", then "Device Manager" then "...COM6".
scanmaster-elm-pcmscan-install-on-fvdi j2534-17


Part 4: Use ScanMaster-ELM to diagnose.
Open "ScanMaster-ELM", choose "Options", then Com6.
scanmaster-elm-pcmscan-install-on-fvdi j2534-18


Click on "Start" then "Connect".
scanmaster-elm-pcmscan-install-on-fvdi j2534-19


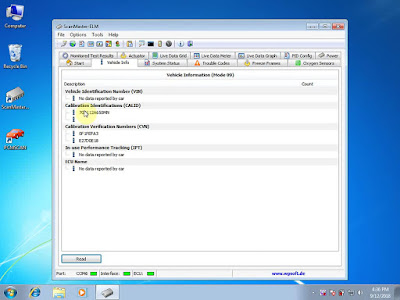
Vehicle Info.
scanmaster-elm-pcmscan-install-on-fvdi j2534-20


System Status
scanmaster-elm-pcmscan-install-on-fvdi j2534-21


Trouble codes
scanmaster-elm-pcmscan-install-on-fvdi j2534-22


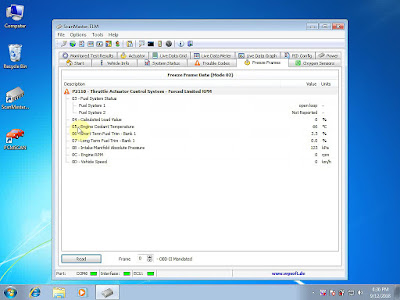
Freeze Frames
scanmaster-elm-pcmscan-install-on-fvdi j2534-23


Oxgen Sensor
scanmaster-elm-pcmscan-install-on-fvdi j2534-24


Click on "Power".
scanmaster-elm-pcmscan-install-on-fvdi j2534-25


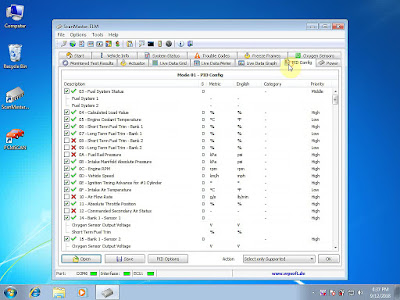
PID config
scanmaster-elm-pcmscan-install-on-fvdi j2534-26


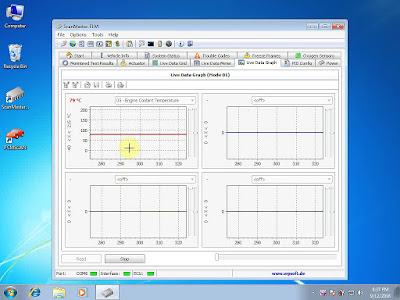
Live Data Graph
scanmaster-elm-pcmscan-install-on-fvdi j2534-27


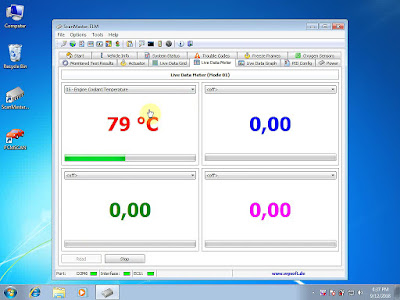
Live data meter
scanmaster-elm-pcmscan-install-on-fvdi j2534-28


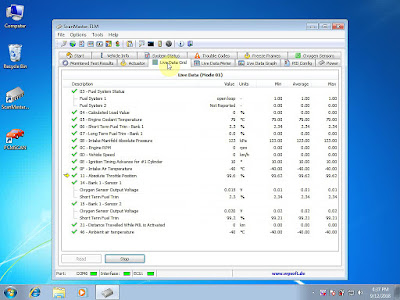
Live data Grid
scanmaster-elm-pcmscan-install-on-fvdi j2534-29


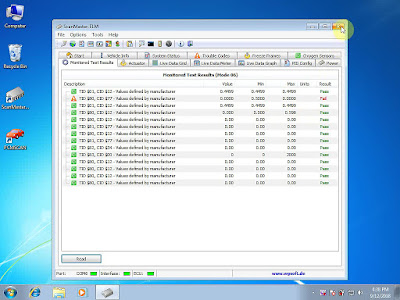
Monitored test results.
scanmaster-elm-pcmscan-install-on-fvdi j2534-30


Part 5: Use PCMscan to diagnose.

scanmaster-elm-pcmscan-install-on-fvdi j2534-31

scanmaster-elm-pcmscan-install-on-fvdi j2534-32

scanmaster-elm-pcmscan-install-on-fvdi j2534-33


Article source: http://blog.obd2shop.co.uk/fvdi-j2534-feedback-fit-scanmaster-elm-pcmscan-for-ford-diagnosis/

Sunday, 16 September 2018

(Solved) BMW E60 E60'04 has no signal from AHL module in inpa & ISTA

BMW E60 2004 year issues with my xenon headlight height adjustment. It does not move at all and there is no self check at startup. The green light is blinking, in auto and in low beam setting and I have error E519 (Alive signal from ALC is missing). Bought new motors for in the headlight, doesn't work but then I thought and read alot and now I am suspecting the AHL module (behind the glove box).

Tools to use:
BMW ICOM with Inpa and ISTA
Through INPA I can access the: Light Module and check all the low beams, high beams, blinking lights etc etc. But when I get the headlight vertical aim control I get an error from INPA:
bmw-e60-xenon-headlight-height-adjustment-error-with-inpa

My car is from 2004 and the I believe the LMA controls, through the AHL, the stepper motors in the headlight. What should I first look for? Get a "new" AHL module or check for example the 2 height control sensors under the car?

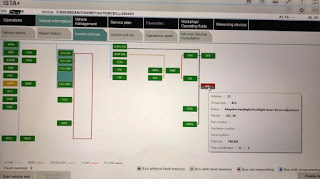
In addition in ISTA+ the AHL module is colored red and I also cannot read the AHL ECU:
ISTA AHL error

Suggestion & Guidance:
You got an fault code that stated "No signal from AHL module...", you got trouble acessing AHL module with inpa, you got a communication fault in ISTA.
What other "hints" do you need? Of course you should replace the AHL module, new stepper motors is a waste of money. Issues with AHL ecu are quite common, so get a good used one or a new one, plug in, code, done.

Further Questions and Answers:
I replaced the AHL module and added the VO $524A.
VO 524

And recoded the AHL module.

Result: steady, non blinking green LED next to the light switch -:D
Now in ISTA the AHL module is accessible. Physical check on startup with selector to the most right or on auto, I cannot see the leveling. Or when I slide the wheel of the height selector from 0 to 2
Anyone know where to test them in INPA of ISTA?

Or am I wrong with the VO list? I have Xenon low beams, halogen high beams. pre-lci from '04.
Currently:
$502 Headlight cleaning
$522A Xenon light
$524 Driving light control / Adaptive headlights

Just realized I do not have the $510 Headlight vertical aim control (vaguely remember trying to add the $510 last week, did not work. But did not have the new AHL module) so I will try this tonight
Yesterday I could not add the $510 - Headlight vertical aim control. It gave me an error after adding it: Invalid choice or something.

Answer: 
there is no option code $510 for E60/E61. If you have xenon, you'll have auto leveling. If you have no adaptive headlights, you do not have any AHL ecu! If you don't have adaptive headlights, you don't have stepper motor controllers ata the bottom of the headlight housing. If you DO have adaptive headlights, you'll found $524 in the VO. There is no (non-modified) car with $524 but without AHL ecu and vice versa.
So either someone modified the car and this didn't work well, or I'm missing something here
Make sure the the ne AHL ecu is plugged in, make sure $522 and $524 is in VO, code ALC and 2LSMC and 2RSMC. Auto level should work now, so should the adaptive headlights. Put light switch in "auto", cover light sensor so low beam turns on, move wheel to the right (it LHR, otherwise to the left) and watch the beams, they should move.

Question:
I have been reading a lot lately, and getting more confused. About my headlights So these are the ones I have:
headlight closeup1

headlight closeup

I do not see ADAPTIVE HEADLIGHT on the lense and I do not have SMC controllers under the headlight housing.

-My car is a 04-2004 so I have a AHL/ALC module behind the glovebox.
-I coded $524 (adaptive headlight) and can see the AHL module, but also the LSMC and RSMC.

In INPA I can access the Adaptive headlight module:

inpa ahl in

Where I can see that the 2 level sensors are working (when I shake the car, the voltage changes). But I dont get the Power supply SMC because my car would not have it right?

When I go to INPA into the Light Control Switch still shows this error:

inpa-ediabas-error-02

So based on the picture of my headlight, do I have Adaptive Lights? I don't think so, so what to code for my vertical xenon height adjustment to work? Maybe another far fetched idea, maybe the previous owner changed the 2 headlights for non adaptive?
Another small thing: my light switch has a manual height control wheel:

light switch w manual adjuster

I have ordered one without manual adjuster.

I have the leveling sensors so for sure I should have originally installed xenons (just dont know if its the Adaptave or non-adaptive) with height leveling. I do have an AHL/ALC module. I did reprogram the AHL/ALC module with SG_CODIEREN.
The only thing is that I cannot access the LSMC/RSMC in NCSExpert to reprogram (SG_CODIEREN).

LSMC: coding faulty
LSMC fault

In ISTA it shows the AHL/ALC module as Adaptive headlight/headlight beam throw adjustment.

AHL ecu zoomed in

Answer: 
Ok, here is my conclusion: You car was build with Xenon and AHL. AHL works only with Xenon and the AHL ecu behind the glovebox is the prove that there was AHL installed... long time ago!? 
The fact that you have normal Xenon headlights installed with light switch for non-xenon cars proves that you shouldn't hand out tools to total morons!!! Great Scott!
So here is the problem: Whats installed on your car can not work, that's for sure.
Changing the light switch to a proper one is the first step. Now there is the problem with AHL/non-AHL. Either you need to replace headlights or other you need to change wiring. As I mentioned before, Cars with normal xenon (non AHL), dont have the AHL ecu. Auto leveling is done by LMA and there are also no SMC. Non AHL cars have a 4-pin connector for leveling, AHL cars only 3. Non-AHL wires connects LMA with headlights, AHL wires connects AHL ecu with headlights. Also, in every case, you need a non AHL xenon "auto LWR" LMA. Have you checked this? Maybe its also a wrong one!
There some work to do, what way do you wanna go?

Credits for hobbyschrauber of bmwcoding.com

Article Source: http://blog.obd2shop.co.uk/how-to-fix-e6004-xenon-auto-leveling-issue-by-inpa-ista/

Monday, 9 July 2018

How to install ODIS-E 6.7.5 Postsetup 67.5.10 on Win 7 8?

Multi-lingual ODIS-E 6.7.5 Postsetup 67.5.10 supports diagnosis, programming and enable to hidden features. VAS 5054A ODIS 6.75 software can copy, no need activation. It is compatible with WIN7 / 8 and work with VAS 5054A Bluetooth and VAS 5054A Plus.

vas-5054a-odis-engineering-software-1

vas-5054a-odis-engineering-software-2

ODIS-E 6.7.5 Postsetup 67.5.10 download:

How to setup ODIS-E 6.7.5 Postsetup 67.5.10 on Win 7 8 setup?


Steps:
Step 1: Install setup assistant
Step 2: Register ODIS-E 6.7.5
Step 3: Download Postsetup
Step 4: Test ODIS Engineering 6.7.5
Step 5: Repair Bluetooth
The most important: Change the date of the computer!!!!!!!!!!!!!

odis-engineering-6.7.5-setup-change-date

Step 1: Install Setup Assistant
Change date and time
Change date to January 1st, 2017 (UTC-8:00) Pacific Time (US & Canada)
Open ODIS-E 6.75 software CD
Copy 6.7.5 kg-pass 123 zip file to desktop
Extract zip file on desktop with encrypted password: 123
Delete zip file on desktop
Copy 6.75 (engineering) folder to desktop and open it
Open OffboardDiagSetup-Engineering_6_7_5
Select setup language
Install ODIS-E setup assistant
Click on Next
select Target folder
click Next
select a directory C:/ODIS-DIAG-MODULES-ENGIN
click on Next
select diagnostic interface: VAS 5054
A Bluetooth pairing must be established to use the vas5054, click on Next
License file selection
search desktop->工程 6.7.5 folder->license.dat
click next
Tick create a folder in the start menu
click Next
installing Offboard Diagnostic Information System Engineering
install Microsoft Visual C++2005
Accept the windows security warning by clicking on Install
Finish install Setup assistant
Restart the computer

Step 2: Register ODIS-E 6.7.5
Delete VW-MCD-PDX-Builder file on desktop
Start-> All Program-> Offboard Diagnostic Information System Engineering folder ->Send Offboard Diagnostic Information System Engineering software to desktop
Start-> All Program->Softing D-PDU API for VCIs V1.20.037 folder->send EDIC Configuration Manager to desktop
Right click Offboard Diagnostic Information System on desktop open Properties->Open file location
Open 工程 6.7.5 folder on desktop
Copy and replace OffboardDiagLauncher on Offboard Diagnostic Information System desktop folder
Open Offboard Diagnostic Information System software on desktop
Software will require to enter registration key
Open 工程 6.7.5 folder on desktop
Open key generator
enter registration name: abc
Copy Hardware ID to key generator and click on Generate
it will generate registration key
paste the key to software Key area
click Register

Step 3: Download Postsetup
open ODIS-E postsetup
select local directory
C:/Users/AADD/Desktop/6.75 Engineering-> Database->ODIS_Engineering
if software prompt “no valid software configuration could be found”, select the destination
C:/Users/AADD/Desktop/6.75 Engineering-> Database
click next
select Postsetup language
check postsetup version: 67.5.10
Press next icon to download postsetup
download completed will launch software automatically

Step 4: Test Software
Select Admin->Diagnostic data
open C:/Users/AADD/Desktop/6.75 Engineering-> diagnostic data->AU (Audi)->ODXUPDATE
Select LB (Lamborghini, Bentley),SE (Seat),SK (Skoda),VW ODXUPDATE on by one
Connect VAS 5054a with computer by USB
Open Computer->Manager->Device Manager->Softing Vehicle Interface->VAS5054
Open EDIC Configuration Manager
Current connection is USB connection
Open Offboard Diagnostic Information System Engineering software on desktop
click on Diagnosis
Coding function
special functions, i.e ECU programming, application programming etc

Step 5: Pair Bluetooth
Installing device driver software
device is ready
select Bluetooth icon,add a device VAS5054
enter the device pairing code: 082145725
click on Next
this driver has been successfully added to this computer
Open EDIC Configuration Manager-> Add a new device
select COM Port 4
Bluetooth connection and com port setup success.
Run ODIS-E 6.7.5 software and diagnose vehicle.
Done!

Tuesday, 5 June 2018

Scania SDP3 2.35.0 free download and activation service

Offer Scania SDP3 2.35.0 free download and activation service.

Scania Diagnos & Programmer 3 (SDP3) communicates with Scania vehicles and Scania industrial and marine engines. The program has been developed to support the electrical system with CAN communication. The program is used for troubleshooting, adjusting customer parameters, calibrations, conversions affecting the electrical system and updating software in control units.

Scania SDP3 2.35.0 free download
http://www.obd2shop.co.uk/wholesale/sdp3-v234-diagnos-programmer-activation-without-dongle.html

Scania SDP3 2.35.0

No dongle!
Installation and Activation:
The seller offers download link, after you finish download, just offer your TeamViewer ID and password for installation and activation for free.

Multiple languages available:
English, German, Spanish, French, Japanese, Dutch, Persian, Polish, Portuguese, Swedish, Norwegian, Finnish, Turkish, Italian, Czech, Russian, Chinese.

Works with
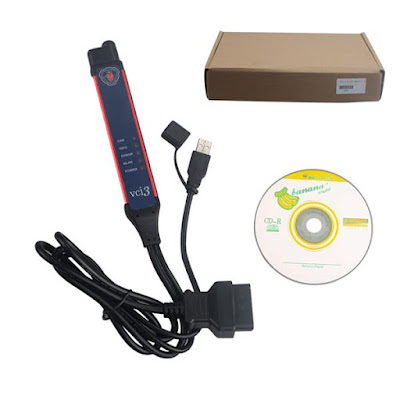
Scania VCI3 Wifi diagnostic tool

Scania VCI3


Installation:
1) OS: Windows 7 or 8 will be better.
Net Framework 4.5 (Required)

Installation tip:
administrator rights are required.

Scania SDP3 can perform:
Check and adjustments
Conversion
Maintenance
Campaign
Bodywork
Fault Codes
Fault Reporting
Programming of Control units

Other source of Scania SDP3 2.35 free download:
Multilanguage Scania SDP3 (Diagnosis & Programmer) 2.35.0 [1805] Free download:
No dongle!
Extract using latest winrar

Pass: scania2018@
Activation: not sure, maybe you can contact @teo32 (poster of mhhauto.com which need money to be a member.


Wednesday, 25 April 2018

VPECKER E4 Tablet Diagnostic Tool New Update - HYUNDAI and KIA

Here is the VPECKER E4 Tablet New Update - HYUNDAI and KIA information, please keep reading to find out more.

HYUNDAI V22.0

1. Updated Europe/General Area vehicle coverage up to 2019.

2. Added 23 Vehicle models:

ACCENT(HC), ACCENT(HCI), ACCENT/SOLARIS(HCR), CRETA(GS), CRETA(GSB), CRETA(GSR), ELANTRA(ADI), G70(IK), GALLOPER-2(M1)-PDF, GENESIS COUPE(BK)-U.S., GENESIS(BH)-U.S., GRANDEUR/AZERA(IG), H350(EU), i30(PD), i30(PDE), i30N(PDEN), IONIQ PHEV(AE PHEV), KONA(OS), SONATA HYBRID(LF HEV), SONATA HYBRID(LF HEV)-U.S., TUCSON(LM)-BRAZIL, TUCSON(TLe), TUCSON(TLI).

3. Added 39 kinds of special functions:

1) 12V Current Sensor Offset Correction Function
2) Air Cut Off Valve Open Mode
3) Alternator TEST
4) AMP Operation Test
5) Assembly Check
6) Assembly Check (ECU replacement)
7) AT Adaptation Mode
8) AVM Calibration
9) AVM Tolerance compensation - Auto
10) Break Pad Change Mode
11) BSD variant coding
12) Checking the wear amount of clutch
13) Clutch compensation value setting
14) Engine Clutch/Motor Resolver Adaptation
15) Engine coolant filling mode
16) EOP TEST (Electric Oil Pump Test)
17) EPCU (MCU) self - diagnosis function
18) Erase Network Configuration
19) Fluid Circulation Mode
20) G - Sensor Calibration
21) Headrest Setting
22  High Pressure Release Mode
23) HPCU (MCU/GCU) self - diagnosis function
24) Immobilizer Reset
25) Initialization of Automatic Resolver Offset Calibration
26) Initialization of rear door curtains
27) Initialization of the engine clutch inspection line learning and diagnostic information
28) LEARNT KEYS
29) Master Key Delete
30) Master Key Record/Change
31) MOBIS MDPS Torque Test
32  Pad Change Mode
33  PCSV TEST (Option)
34) Power Tailgate Mode Configuration
35) Removal of air from engine clutch hydraulic pressure line
36) Seat Limit Position Setting State
37) SJB TEST,SOC Calibration, Solenoid valve inspection for hydrogen tank
38) SPC Calibration
39) Stabilization of the engine clutch hardware transfer torque

KIA V22.0

1. Updated Europe/General Area vehicle coverage up to 2017.

2. Added 7 Vehicle models:

CADENZA(YG),CERATO/FORTE(YDm),Niro(DE HEV),OPTIMA HEV(JF HEV),OPTIMA PHEV(JF PHEV),OPTIMA(JFA) - For Mexico only,SPORTAGE(QL).

3. Added 10 kinds of special functions:

1) Camera image correction function
2) Checking the wear amount of clutch
3) Clutch compensation value setting
4) Engine Clutch / Motor Resolver Adaptation
5) HPCU (MCU / GCU) self - diagnosis function
6) Initialization of the engine clutch inspection line learning and diagnostic information
7) ISG (Idle Stop and Go) System Check
8) Removal of air from engine clutch hydraulic pressure line
9) SOC Calibration
10) Stabilization of the engine clutch hardware transfer torque

VPECKER E4 for sale: http://www.obd2shop.co.uk/wholesale/vpecker-e4-multi-functional-tablet-diagnostic-tool.html

Thursday, 12 April 2018

2018 Launch X431 EasyDiag 3.0 Plus with 2 free Vehicles Software

This Launch X431 EasyDiag 3.0 Plus includes 2 free vesicles software+DEMO+EOBD, it is easy to work with your ios device, making your iPhone or iPad a powerful diagnostic scanner!

Launch X431 Easydiag 3.0 plus Description:

This new powerful tool is easy to work with your ios device, making your iPhone or iPad a powerful diagnostic scanner!
This tool can update on launch website,once your register successfully, you can choose the car brands software based on your requirment and pay for it,then you can download to your iPhone or iPad or Android device.
Then, connect your iPhone / iPad / Android device with Launch X431 EasyDiag, you can diagnose the cars.
This tool does not require an interface. A single Bluetooth connector along with the company's software allows the user to select from over
30 manufacturers for Asian, European and Domestic applications.

X431 Easydiag 3.0 plus Features and Functions:

1. Full OBDII generic code reader/scanner capability included at no charge
2. Read and clear codes on all vehicle systems
3. Complete system and subsystem coverage (engine, ABS, SRS, transmission and more) with live date and color graphing
4. Enhanced live date and for all vehicle system
5. Includes Bluetooth OBDII connector-optional extension cable available for easier plugging and unplugging of OBDII connector
6. Intuitive interface and easy to use
7. Customizable software-choose from over 70 Asian, European and North American manufacturer for enhanced capability
8. Single carline software priced individually per vehicle manufacturer Additional coverage, capabilities and functions with each new software update

Easydiag 3.0 Language Support:

Chinese Simplified, English, Chinese Traditional, Japanese, Korean, French, Spanish, Portuguese, Italian, Russian, German, Polish, Romanian, Dutch, Arabic, Czech, Danish, Greek, Persian , Finnish, Hungarian, Swedish, Turkish, Serbian, Croatian

X431 Easydiag 3.0 plus vehicle support:

USA: for BXGM, for CHRYSLER, for G-M, for USAFORD

European: for AUDI, for BENZ, for BMW, for CITROEN, for DACIA, for EUROFORD, for FIAT, for GAZ, for GMSA, for JAGUAR, for LANCIA, for LANDROVER, for MINI, for OPEL, for PEUGEOT, for PORSCHE, for RENAULT, for ROMEO, for ROVER, for SAAB, for SEAT, for SKODA, for SMART, for SPRINTER, for VAZ, for VOLVO, for VW, for FORD

Aisan: for ACURA, for DAEWOO, for DAIHATSU, for HOLDEN, for HONDA, for HYUNDAI, for INFINITI, for JPISUZU, for KIA, for LEXUS, for MAHINDRA, for MARUTI, for MAZDA, for MITSUBISHI, for NISSAN, for PERODUA, for PROTON, for SSANGYONG, for SBARU, for SUZUKI, for TATA, for TLISUZU, for TOYOTA

Please kindly note that:

1. Precautions on operating vehicle's ECU
2. Do not disconnect the vehicle inner consume when the ignition switch is on, so as to avoid the sensors or the ECU damage.
3. Do not place the magnetic object near the ECU in order to avoid the failure of the circuitry and components.
4. Do cut off the power supply of ECU system before welding on the vehicle.
5. Pay more attention to the ECU and the sensors when the operation is next to them.
6. Ground yourself when you disassemble PROM,otherwise ECU and sensors will be damaged by static electricity.
7. Do connect ECU harness connector firmly,otherwise electronic elements, such as IC inside ECU, will be damaged.
8. The instrument is a precision electronic instrument. Pay more attention when in use, do not have it dashed.
9. The equipment power is supplied by 12v battery voltage;do not use other voltage power.
10. Turn off the ignition switch when connect or disconnect the diagnostic connector.
11. Put the EasyDiag in its place on the back of the protective casing in order to avoid lost.

Easydiag 3.0 vs. Easydiag 2.0

ItemEasydiag 3.0Easydiag 2.0
Image     Launch X431 Easydiag 3.0  Launch Easydiag 2.0
Operating temperature-10℃ ~ 50℃-10℃ ~ 50℃
Operating Voltage9~18V9~18V
Working current≤100mA≤100mA
Diagnosis methodBluetooth 4.2Bluetooth 2.0
X431 Easydiag 3.0 Package including:

1pc x EasyDiag Connector
1pc x Password Paper

X431 Easydiag 3.0 Package including